NOTES
- The images supplied in this piece are meant as a visual aid only and should not be used for scaling or dimensioning.
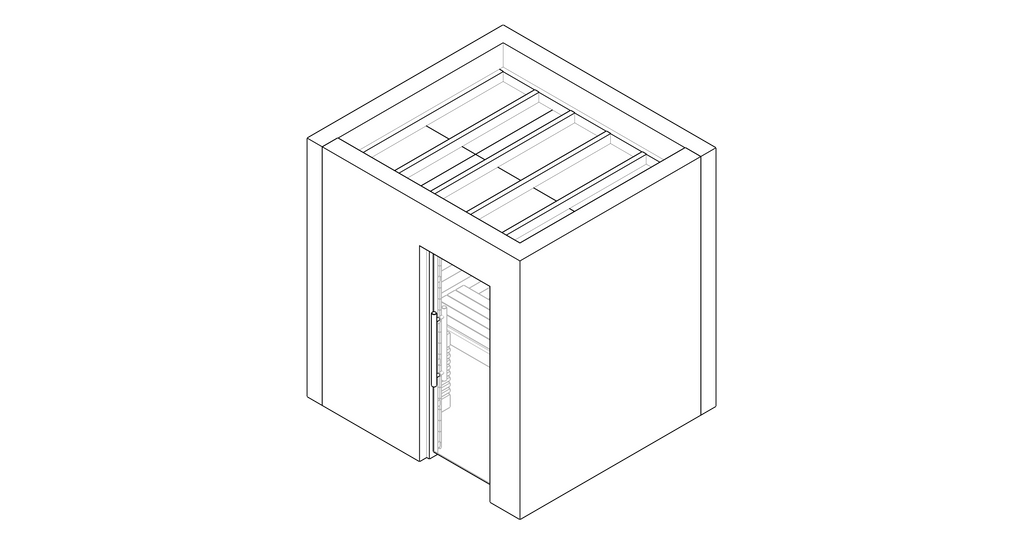
- In many of the following images, the ‘front’ walls and/or ceiling are hidden to aid visualisation. Processes required of the ‘back’ walls and/or ceiling are likely required of the ‘front’ walls also.
- Where the studwork walls have been hidden, their positions have been marked on the images for reference.
- If you are ever uncertain of any measurement or detail, please contact Finnmark Sauna.
1. Room Prep
Ensure pre-installation specification has been met:
- Make sure the heater power cable (a rubberised H07RN-F of adequate gauge for the power of the sauna heater) is correct, is in the correct location for connection, and has a suitable length of tail.
- Make sure lighting power cable(s) are correctly located for connection.
- Ensure that walls and lowered ceiling have been built to spec. Making sure that the walls are square and accurate at the beginning prevents headaches later on in the build.
- If there are any masonry walls, check that they are smooth, square, and flat. Remove any irregularities.
- Finnmark recommends ‘dry-fitting’ the benches into the space before work begins, to ensure they will fit correctly inside the sauna once all of the wall build-up has been installed. The build-up is typically 70mm per wall, but will vary depending on studwork accuracy, adhesive methods, and batten thickness.
Ensure pre-installation specification has been met
2. Insulation & Vapour Sealing
Fix insulation boards to walls and ceiling. Ensure they are fitted against each other with no gaps.
- Where insulation boards need fixing to studwork, use occasional screws.
- Where insulation boards need fixing to masonry, use expanding foam adhesive.
-
NOTE: Be sure to mark the locations of the studs on to the faces of the boards with a permanent marker.


Fix insulation to interior surfaces of sauna (front walls and ceiling hidden)
- Seal the lowest boards on the wall to the tiled floor with general purpose silicone.
- Core drill holes for the ventilation ducting into the Kingspan Sauna Satu insulation boards, as dimensioned in any drawings.
- Pass the ducting through the wall with a suitable tail on the inside.
- Seal the ducting into the wall with expanding foam adhesive.
- Cut the ducting flush with the face of the insulation and seal round from the face of the insulation board to the internal diameter of the duct with self-adhesive aluminium tape.
- Use the self-adhesive aluminium tape to seal up all joins, holes and screw-heads in the vapour barrier. Please do this thoroughly as it is imperative for preventing interstitial condensation.
3. Battens
Fix battens to walls which will be used to support the benches. These should be doubled up as pictured, and be placed with their top faces at 900mm and 450mm.
- Where battens will be fixed to studs, use wood screws 80mm or longer.
- Where battens will be fixed to masonry, pilot drill with an SDS. Then use either 100mm concrete fixing screws or use wall plugs and 100mm wood screws.
- Do not over-tighten screws as this can pull the batten through the delicate vapour barrier.
- Do not run the battens right into the corners. Leave some space (around 25mm) from the corners of the room when fixing battens to the walls. This space is for running any wiring through the walls and to the ceiling.
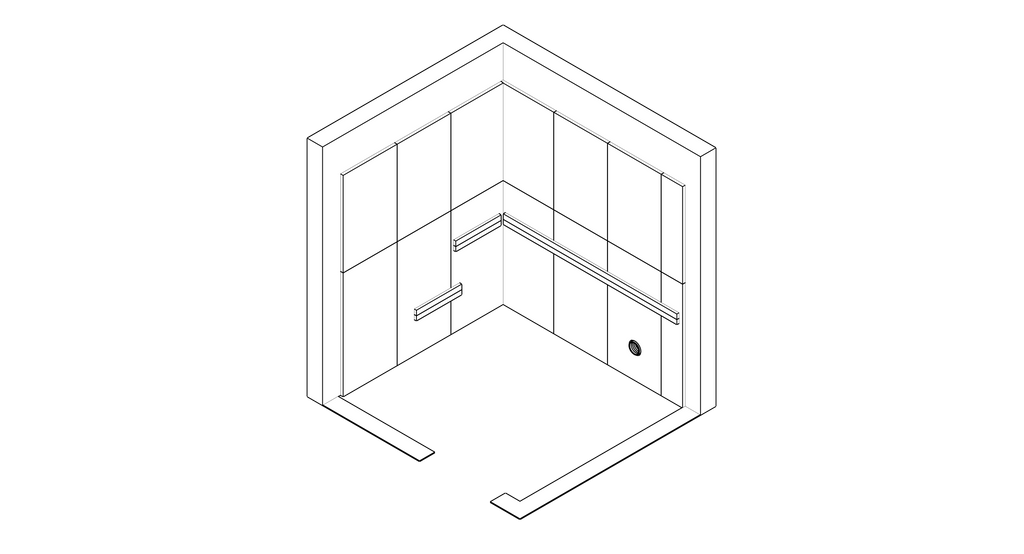
Fix battens to walls to support the benches
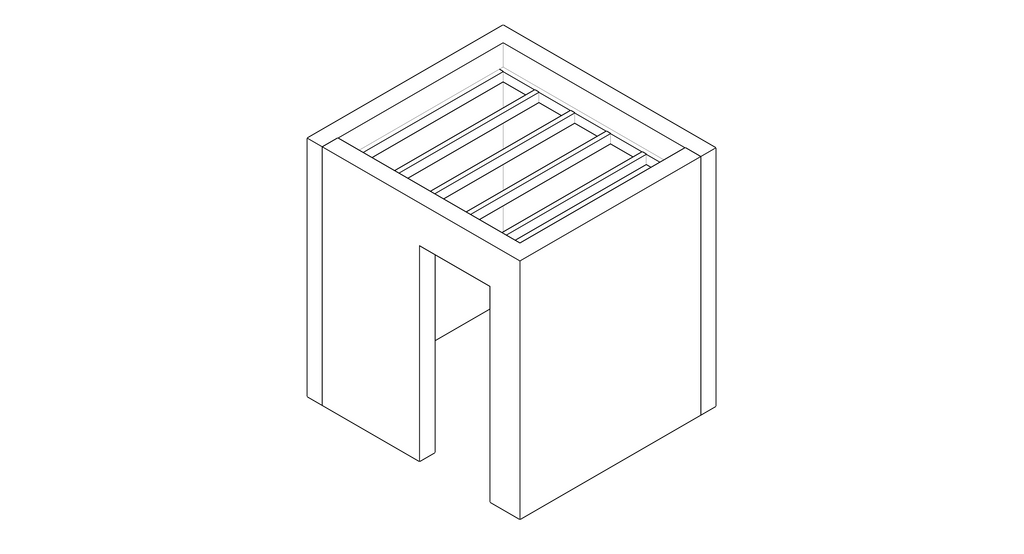
- Fix the remaining battens to the walls and ceiling. These are for mounting the cladding boards onto and should be fixed perpendicular to the direction of the cladding. Aim to space them at 400mm centres.
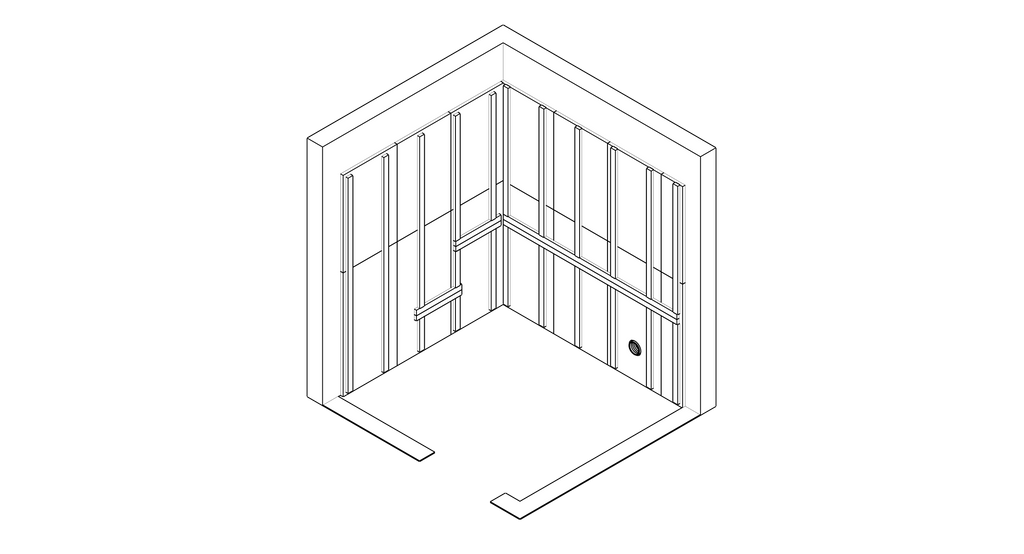
Fix battens to walls and ceiling
4. Pre-Wiring
Run the wiring for the bench lighting and extractor fan. Pull wires/fish tape for the heater thermostat and remote control prior to cladding. Tape the wires to the vapour barrier so that the ends terminate in the areas denoted in the wiring plan.
5. Cladding
- Oil all faces of each sauna cladding board with paraffin oil.
- Drill holes in the boards where cables/wires need to pass through from behind. This can be done as the cladding is fixed to the wall.
- Use a jigsaw or hole saw to make cut-outs for ventilation in the cladding.
- First, clad the ceiling. Make sure that the boards extend beyond the plane of the wallboards. (This is done so that the wallboards act as a back-up support for the ceiling boards).
- Remove the tongue of the first board and start from the top of the wall. Horizontally clad one end of a wall if vertical. Blind nail in the groove side. All other boards may be nailed in the tongue only. The last board may need to be face nailed as well. Please note that it may be necessary to rip the last board down to fit (This applies to the wall cladding also).
- Cut the wallboards so that the ends finish ~10mm from the floor.
- Next, clad the walls. The wallboards should butt up to the ceiling boards and finish 10mm from the floor.
- Screw the sauna vent covers into the cladding, covering the aluminium ducting.
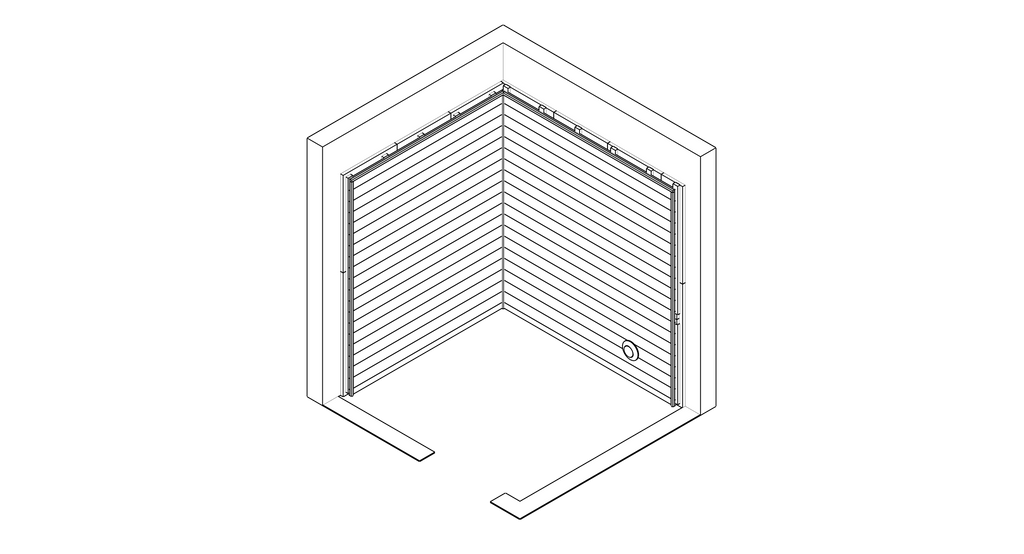
Clad the walls and install the vent covers
- Pin corner mouldings around the perimeter of the ceiling and up the corners between the walls.
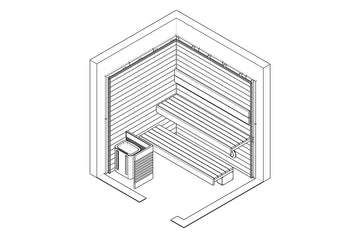
- Oil the bench timber on all faces with paraffin oil.
- Fix the benches in place by screwing through the bench frame and cladding into the load-bearing wall plates.
- Install the upper bench first, then the lower bench, then the step or raised floor (if present)
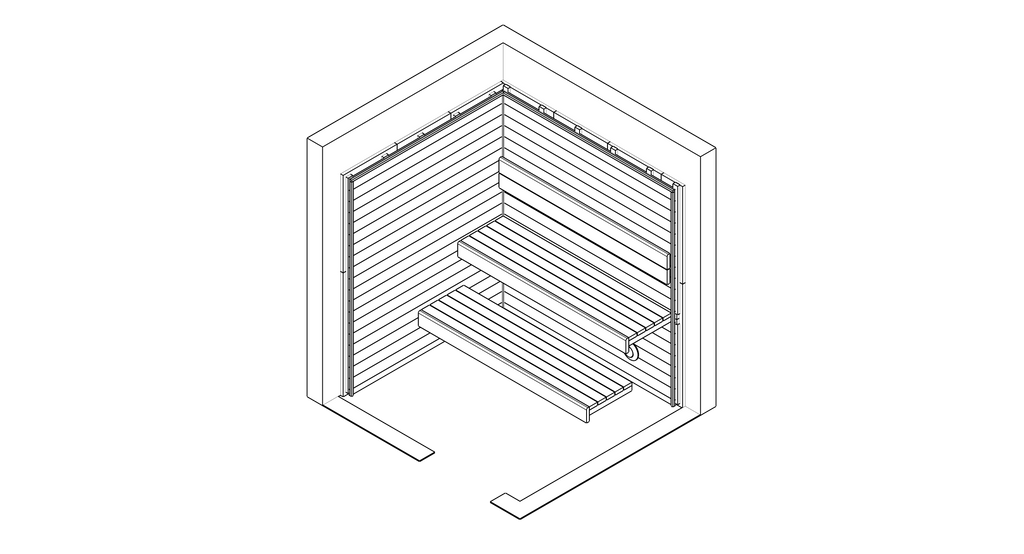
Install the benches
7. Lighting
- Connect the plugs on the end of the ready-made lighting modules to the plugs on the ends of the wiring that was run earlier.
- Clip the modules into the plastic clips on the top of the back-rest and the underside of the front of the benches.
- Site the IP55 sealed enclosure on the wall, out of sight under the benches.
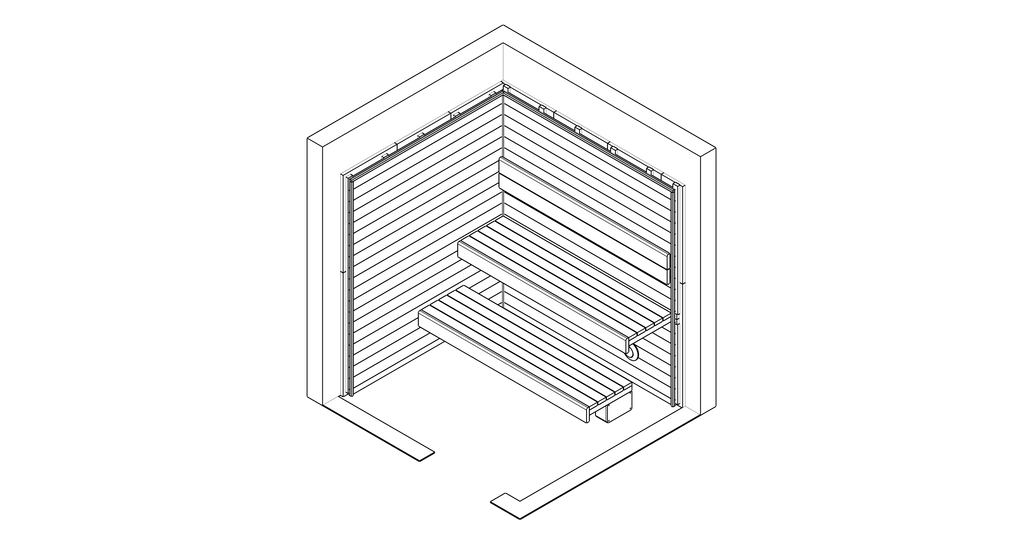 Install the IP55 enclosure
- Pull the mains feed and the low voltage wires from the lighting into the enclosure.
- Connect the mains supply to the live and neutral terminals on the driver.
- Connect the 12v output terminals on the driver to the corresponding positive and negative input terminals on the dimmer.
- Connect the low voltage wires from the lighting to the output of the dimmer. The white wire is positive and the black wire is negative.
- Use P-clips to keep cable routings neat and out of sight.
- Follow the manufacturer’s instructions enclosed in the packaging for how to correctly install and connect the sauna heater. Please note: DO NOT CONNECT ELECTRIC HEATERS ON AN RCD.
- Fix the heater guard in position once the heater is installed, connected and filled with stones.
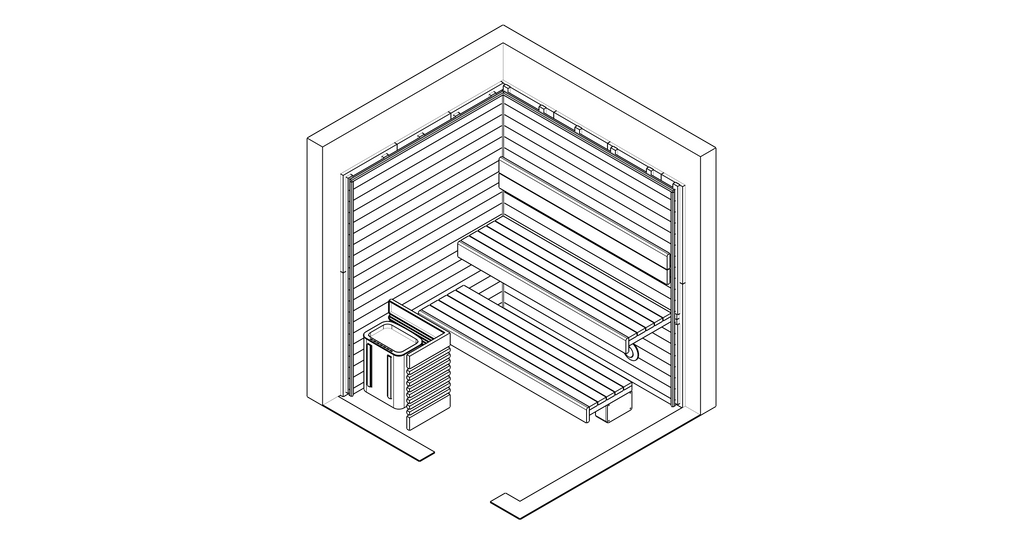
Fix the heater and heater guard in position
- The heater is now ready to be turned on for its initial heating. This can be postponed until all work is finished in the sauna. When heating for the first time, be sure to open all windows and doors for plenty of ventilation whilst the heater burns off any residue.
- Offer up the door/frame to the opening in the wall. Chock and pack it out as required.
Install the door
- Once in position, screw the door frame through the recesses.
- Seal around the doorframe with general purpose silicone. Use expanding foam for larger gaps.
- Apply trim around the door frame to tidy the edges.