


The Complete Guide to Cleaning Your Sauna
A clean sauna ensures safety, comfort, and durability whilst enhancing your overall wellness experience. Whether you've invested in a traditional wood-burning sauna or a modern electric model, proper maintenance is essential for preserving the quality of your sauna wood and protecting your investment.
Regular sauna cleaning prevents mildew, mould, and bacteria from building up, extends the lifespan of your installation, and keeps the wood looking pristine and odourless. In this comprehensive guide, we'll walk you through everything you need to know about how to clean a sauna, from daily maintenance routines to annual deep cleaning protocols.
Why Regular Sauna Cleaning is Essential for Health and Longevity
Proper sauna maintenance offers multiple benefits that extend far beyond aesthetics. Saunas create the perfect environment for bacteria and mould to thrive, high heat combined with moisture and organic matter such as sweat, skin cells, and oils. Regular cleaning eliminates these potential health hazards, ensuring every sauna session is safe and hygienic.
Quality sauna wood can last decades when properly maintained. Regular cleaning prevents the decay, warping, and discolouration that occur when sweat, moisture, and bacteria are allowed to penetrate the wood fibres. This protection means your sauna remains functional and beautiful for years to come, whilst also being significantly more cost-effective than repairing or replacing damaged components.
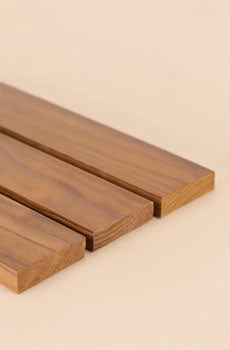
A clean, fresh-smelling sauna is simply more enjoyable. Removing sweat stains, preventing odours, and maintaining the natural beauty of the wood create the relaxing, therapeutic environment that makes sauna bathing so beneficial. Sauna wood—whether Thermowood, cedar, or Nordic spruce requires special care to maintain its insulating properties and structural integrity.
Types of Saunas and Their Unique Cleaning Needs
Different sauna types require slightly varied cleaning approaches. Traditional wood-burning saunas represent the authentic Finnish sauna experience and require particular attention during cleaning. The stove requires regular ash removal after each use, whilst the chimney and flue systems need periodic inspection and cleaning. Wood-burning saunas can produce more moisture variation, requiring careful ventilation management.
Electric saunas are the most common type in UK homes and offer easier maintenance. They provide consistent, controlled heat with predictable moisture levels, and without ash or soot, the cleaning process focuses primarily on wood care and general hygiene. Electric elements and stones require periodic cleaning and stone replacement. Always ensure power is disconnected before cleaning around any electrical components.
Both sauna types share the fundamental requirement of protecting wooden surfaces from excess moisture, which can lead to warping, decay, and mould growth. Traditional saunas with wood-burning and electric heaters are usually made of wooden benches and cladding, needing special care to avoid saturating the wood with excess moisture.
Essential Sauna Cleaning Supplies and Products
Using the right cleaning products is crucial for maintaining your sauna without damaging its delicate wooden surfaces. Here's everything you'll need:
Basic cleaning tools:
-
Soft-bristle brush or sponge (never use abrasive scrubbers)
-
Microfibre cloths for wiping and drying
-
Vacuum cleaner or long-handled brush
-
Fine-grit sandpaper (150-180 grit) for stubborn stains
-
Bucket for mixing cleaning solutions
Natural cleaning solutions:
-
Diluted white vinegar (1 part vinegar to 3 parts warm water)
-
Baking soda paste (3 parts baking soda to 1 part water)
-
Lemon juice and water solution
-
Mild, natural soap diluted in water
Specialist products:
-
Professional sauna cleaner designed specifically for timber
-
Paraffin oil for annual treatments (recommended 1-2 times yearly)
What to avoid: Never use bleach or chlorine-based cleaners, ammonia or harsh chemical detergents, abrasive cleaning powders, furniture polish or wood stains, pressure washers or hoses, or varnish, paint, or polyurethane on interior surfaces. These products can damage wood fibres, create toxic fumes when heated, leave harmful residues, or compromise the wood's natural breathability.
How Often Should You Clean Your Sauna? Complete Frequency Guide
Understanding the appropriate cleaning frequency ensures your sauna remains hygienic without over-maintaining it. Light cleaning should be done after every use, which includes wiping down benches and ensuring proper ventilation. For moderate to heavy use (4-5+ times per week), perform a thorough weekly deep clean involving vacuuming, scrubbing surfaces with appropriate cleaner, treating stains, and cleaning sauna stones and heater exterior.
Monthly maintenance should include inspecting all surfaces for damage, checking ventilation systems, examining sauna stones for deterioration, and deep cleaning the floor, including under benches. An annual deep clean is essential and should involve sanding benches to restore smooth surfaces, applying paraffin oil to protect wood, replacing sauna stones, inspecting and tightening fixtures, and conducting a comprehensive inspection of wood condition.
Daily Sauna Maintenance: Simple Steps After Each Use
Establishing a consistent daily routine is the foundation of effective sauna care. These quick, simple tasks take just minutes but dramatically reduce the need for intensive cleaning later.
Before you enter, always shower first to remove dirt, oils, dead skin cells, body products, and sweat. Consider wearing clean sauna sandals to the door, then removing them before entering to prevent tracking outdoor dirt onto clean sauna floors. Bring sufficiently large, absorbent towels to completely cover any bench surface where you'll sit or recline.
During your sauna session, the single most important preventative measure is using towels or dedicated sauna seat covers on all bench surfaces. This barrier absorbs sweat and oils before they can penetrate the wood, dramatically reducing staining and bacterial growth. If your towel becomes saturated with sweat, switch to a dry one, as wet towels offer less protection for the wood beneath. Never sit or lie directly on wooden surfaces without towel protection.
After use, wipe down all benches, backrests, walls, and the door with a damp cloth whilst the sauna is still warm. This removes sweat and oils before they can set into the wood. Use a soft brush or dry cloth to remove any dirt, hair, or debris from the floor, paying attention to corners and the area beneath benches.
Ventilation is critical; leave the sauna door wide open after use, or open the ceiling dump vent. This allows air circulation to remove excess humidity and helps the interior dry completely. Remove all used towels, water buckets, ladles, and accessories. Never leave damp items inside a closed sauna.
How to Deep Clean Sauna Wood: Weekly Maintenance Guide
A weekly deep clean keeps your sauna in optimal condition and prevents the buildup of stubborn stains or odours. Set aside 30-45 minutes for this thorough cleaning routine.
Step 1: Remove loose dirt and dust. Start by using a vacuum cleaner with a soft brush attachment to remove all loose dirt, dust, and debris from bench surfaces, walls and cladding, floors and corners, behind and beneath benches, and door frames. Use a long-handled, soft-bristle brush to sweep areas the vacuum cannot reach, particularly between wall panels, ceiling corners and vent openings, under permanent benches, and around heater guards and stones.
Step 2: Prepare your cleaning solution. For general cleaning, mix a gentle solution of 1 part white vinegar to 3 parts warm water, a few drops of mild, natural soap in warm water, or use a specialist sauna cleaner according to the manufacturer's instructions. For stubborn stains, create a baking soda paste by mixing 3 parts baking soda with 1 part water to create a thick paste.
Step 3: Scrub surfaces gently. Dampen your cloth or sponge in the cleaning solution and wring it out well so it's damp, not dripping wet. Wipe benches, walls, and floors using gentle, circular motions, working systematically from top to bottom. Pay special attention to bench surfaces, backrests and headrests, door interior and handle, areas around the heater, and floorboards. It's critical to avoid oversaturating the wood, as excess moisture can cause warping and damage.
Step 4: Remove sweat stains from sauna benches. For fresh stains, apply your cleaning solution directly to the stained area, let it sit for 2-3 minutes, scrub gently with a soft brush using circular motions, wipe clean with a damp cloth, and dry immediately with a dry towel. For stubborn or set-in stains, create a baking soda paste with a thick consistency, apply generously to the stained area, let it sit for 5-10 minutes, scrub gently with a soft brush, wipe away residue with a damp cloth, rinse with clean water, and dry thoroughly. For particularly persistent stains, lightly sand the affected area with fine-grit sandpaper in the direction of the wood grain using light pressure, then wipe away sanding dust with a slightly damp cloth and allow to dry completely.
Step 5: Clean floors and hard-to-reach areas. Never soak wooden floors—use a damp mop or cloth. Pay special attention to the area around the bench legs where dirt accumulates. Clean between floorboards using a thin brush or a cloth wrapped around a ruler. For plastic or rubber floor gratings, remove them and wash outside the sauna with soapy water, rinse, and dry before replacing. Use a thin brush, old toothbrush, or cloth-wrapped tool to clean between wall panels, remove buildup from corners and edges, clean ventilation grate openings, and wipe door seals and hinges.
Step 6: Ventilate and dry thoroughly. Open all vents and doors to create maximum airflow. Turn on the heater for 30 minutes at a moderate temperature to help evaporate any residual moisture from cleaning. Leave the door open after switching off the heater until everything is completely dry. Wipe down surfaces one final time with a dry cloth if any moisture remains. Thorough drying prevents moisture from penetrating deep into the wood, which can cause warping, discolouration, and mould growth.
Cleaning Sauna Heaters, Stones, and Accessories
Your sauna's heating system and accessories require specific maintenance attention to ensure optimal performance and safety.
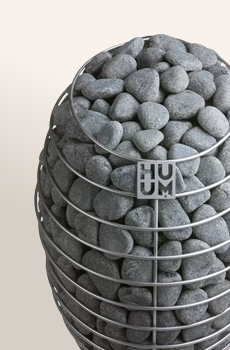
Cleaning sauna stones: Stones are essential for creating the perfect löyly (steam) and require maintenance every 50-100 sessions, with annual deep cleaning or replacement. Ensure the heater is completely cool and power is disconnected, then remove stones carefully one by one, noting their arrangement. Inspect each stone for cracks, crumbling, or excessive mineral buildup. Rinse thoroughly using clean water with no soap to remove dust and mineral deposits. Replace any damaged stones, as cracked or crumbling stones won't heat properly and can damage the heater. Reassemble properly according to manufacturer guidelines, ensuring proper air circulation.
Sauna stones typically need complete replacement every 1-2 years, depending on usage. Replace them immediately if you notice visible cracks or splits, crumbling or flaking, reduced steam production, unusual odours when water is applied, or if stones have become noticeably smaller.
Cleaning electric sauna heaters: Always disconnect power completely before cleaning any electrical components. Ensure the heater is completely cool, then switch off at the circuit breaker. Use a soft, dry brush or vacuum with a brush attachment to remove dust from exterior surfaces and between heating elements. Wipe the exterior with a slightly damp cloth, clean the stone compartment of any fallen fragments, and check for signs of damage or corrosion. Have a qualified electrician inspect electrical connections annually. Never spray water directly on electrical components, use wet cloths near electrical elements, attempt repairs unless qualified, or clean whilst power is connected.
Cleaning wood-burning sauna stoves: After each use, allow the stove to cool completely and remove ash using a dedicated metal scoop and bucket. Weekly for frequent use, empty the ash drawer completely, wipe the exterior with a damp cloth, check the door seal condition, and inspect the glass if present. Monthly tasks include inspecting the flue pipe for creosote buildup, checking all seals and gaskets, and examining the exterior for rust or damage. Annual maintenance requires a professional chimney sweep and inspection, replacing worn seals or gaskets, deep cleaning all components, and checking structural integrity.
Troubleshooting Common Sauna Cleaning Problems
Eliminating sauna odours naturally: Unpleasant odours usually indicate bacterial growth, mildew, or accumulated organic matter. For musty or mildew smells, increase ventilation by leaving the door open longer after sessions, check for hidden moisture problems, deep clean all surfaces with a vinegar solution, run the heater for an extended period to thoroughly dry the interior, and consider installing additional ventilation. For sweat or body odour, enforce pre-sauna showering, increase cleaning frequency, ensure towels are used religiously, deep clean benches with baking soda solution, and run the heater at high temperature to burn off odours.
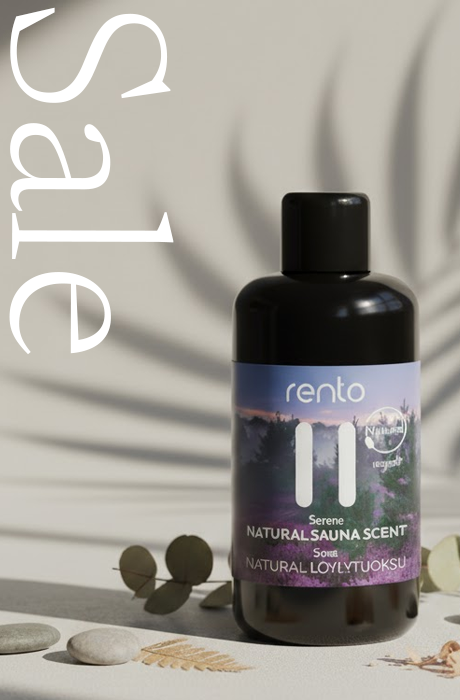
Natural deodorising methods include placing a small bowl of baking soda in the sauna between uses, wiping surfaces with diluted lemon juice, adding a few drops of eucalyptus or pine essential oil to cleaning water (never directly on wood), and ensuring complete drying after each use.
Mould prevention and removal: Mould is a serious issue requiring immediate attention. Prevention relies on ventilation; always ventilate thoroughly after every session, keep the door and vents open until completely dry, avoid leaving damp towels inside, ensure proper exterior ventilation around the sauna room, and check for water leaks or drainage issues.
For early-stage surface mould, create a strong vinegar solution (1:1 ratio with water), spray the affected area generously, let sit for 1 hour, scrub with a stiff brush, wipe clean and dry completely, run the heater to thoroughly dry the area, and monitor closely for recurrence. Established mould growth may require professional remediation, affected wood may need replacement, and underlying moisture issues must be addressed. Warning signs include black, green, or white fuzzy growth, persistent musty odour despite cleaning, wood that feels damp or soft, and discolouration that spreads.
Dealing with wood discolouration: Wood naturally darkens with age and use, but excessive or uneven discolouration can be treated. Some darkening is normal and unavoidable; paraffin oil application can help even out the appearance, so embrace the patina as part of the sauna's character. For uneven discolouration, lightly sand darker areas to blend, apply paraffin oil to the entire surface for uniform colour, and consider whether excessive moisture is causing uneven ageing. Prevention includes using seat covers consistently, maintaining a regular cleaning schedule, ensuring complete drying after cleaning, and annual paraffin oil treatment.
Annual Sauna Deep Clean and Maintenance Checklist
Once or twice per year, your sauna needs comprehensive maintenance beyond regular cleaning. Conduct a structural assessment by checking all benches for stability and secure mounting, examining wall panelling for warping or cracks, inspecting the ceiling for moisture damage, testing door hinges and ensuring proper closure, and verifying floorboards are secure and level. Safety checks should include testing all electrical connections by a qualified person, inspecting the heater for damage or wear, checking that the heater guard is secure, testing light fixtures and replacing old bulbs, and ensuring ventilation systems function properly.
Sanding and refinishing sauna benches: Annual sanding restores benches to a smooth, splinter-free condition. Remove benches if possible to make sanding easier, then use 150-180 grit fine sandpaper, sanding only in the direction of the wood grain. Apply even, light pressure to remove minimal material, focusing on stained, rough, or splintered areas. Wipe away all sanding dust with a slightly damp cloth and allow to dry completely before reassembly. Sand annually or whenever surfaces feel rough, have splinters, when staining cannot be removed by cleaning, the surface appears uneven or worn, or as annual maintenance with light sanding.
Applying paraffin oil to protect sauna wood: Paraffin oil treatment protects wood from discolouration and moisture damage. Ensure all surfaces are completely clean and dry, then apply paraffin oil with a clean, lint-free cloth, working in small sections and rubbing oil into the wood grain. Apply a thin, even coat, avoiding pooling or over-saturation. Allow to absorb for 20-30 minutes, wipe away any excess oil, and allow to cure for 24 hours before using the sauna. Apply 1-2 times annually, depending on usage. Benefits include protection against moisture penetration, reducing staining and discolouration, enhancing wood grain appearance, creating a dirt-resistant surface, and extending wood lifespan.
Common Mistakes to Avoid When Cleaning Your Sauna
Never use bleach or harsh chemicals, as they create toxic fumes when heated, leave chemical residues that can vaporise during use, causing respiratory irritation, break down wood fibres, causing structural damage, cause permanent discolouration and bleaching, and destroy the wood's natural protective properties. Use safe alternatives like white vinegar solutions, baking soda paste, mild natural soaps, or specialist sauna cleaners designed for timber.
Don't over-saturate the wood, as it's porous and absorbs moisture readily. Excessive water causes warping and twisting of boards, splitting and cracking, accelerated decay, mould growth inside the wood, and structural instability. Use proper technique by using damp, not wet cloths, wringing out cleaning cloths thoroughly, never pouring water directly on wood surfaces, never using a hose or pressure washer, always drying surfaces after cleaning, and running the heater to evaporate residual moisture.
Skipping ventilation after use is perhaps the single most important mistake to avoid. Proper ventilation removes excess humidity that promotes mould, prevents moisture from penetrating deep into wood, eliminates odour-causing bacteria, extends wood lifespan dramatically, and reduces the need for intensive cleaning. Best practices include opening the door wide immediately after use, opening ceiling dump vents or wall vents, leaving them open for several hours until completely dry, and in humid climates, considering running a fan.
Can I Use Essential Oils in My Sauna?
Many sauna enthusiasts enjoy aromatic experiences, but essential oils require careful use to avoid damaging your sauna. The proper method is to add 2-4 drops of essential oil to a bucket of water (your sauna pail), never applying oils directly to wood surfaces or pouring oils onto sauna stones. Use oils sparingly to avoid overwhelming scents.
Direct application is harmful because oils can permanently stain and darken wood, may create sticky residues that attract dirt, can damage wood's protective properties, oils on stones create unpleasant burnt odours, and excessive concentration can cause respiratory irritation. Recommended sauna scents include eucalyptus for respiratory benefits, pine for traditional Nordic scent, birch for authentic Finnish experience, peppermint for refreshing qualities, and lavender for relaxation. Remember that less is more—start with fewer drops, mix with water before entering the sauna, test new scents with a single session first, avoid synthetic fragrances, and choose pure, therapeutic-grade oils.
Maintaining Your Sauna for Years of Wellness
A well-maintained sauna provides decades of therapeutic benefits, relaxation, and enjoyment. Whilst sauna cleaning might seem daunting initially, establishing a consistent routine makes it simple and manageable. Prevention is the best medicine—always use towels on benches, enforce pre-sauna showering, ventilate thoroughly after every use, wipe surfaces whilst still warm, and address problems immediately.
Consistency beats intensity. Quick daily maintenance prevents major cleaning sessions, regular weekly cleaning keeps everything manageable, and annual deep cleaning protects your long-term investment. Use appropriate products—natural cleaners protect wood and your health, avoid harsh chemicals, invest in specialist sauna cleaning products when needed, and remember that gentle and damp is always better than harsh and wet.
By following the guidance in this comprehensive article, you'll ensure your sauna remains a clean, hygienic, and inviting space for authentic Finnish wellness experiences. The time you invest in proper maintenance pays dividends in longevity, performance, and pure enjoyment. Regular sauna cleaning will prolong the lifespan of your sauna wood, maintain optimal performance, and keep your wellness sanctuary looking spotless for years to come.
Frequently Asked Questions About Sauna Cleaning
How often should I clean my sauna thoroughly?
Light cleaning should be done after every use, including wiping down benches and ensuring ventilation. Weekly deep cleaning is recommended for regular users (4-5+ times per week), whilst less frequent users can clean every 2-3 weeks. Annual deep cleaning with sanding and oiling should be performed once or twice yearly, depending on usage intensity.
How do I get rid of sweat stains on sauna benches?
For fresh stains, wipe immediately with a damp cloth. For set-in stains, create a paste using three parts baking soda to 1 part water, apply to the stain, let sit for 5-10 minutes, scrub gently with a soft brush, and rinse. For stubborn stains, lightly sand with 150-180-grit fine-grit sandpaper in the direction of the wood grain. Prevention is key; always use absorbent towels on benches.
Should I clean my sauna heater too?
Yes, regular heater maintenance is essential. For electric heaters, ensure power is disconnected, then wipe the exterior with a dry or slightly damp cloth, vacuum dust from around elements, and remove and rinse sauna stones every few months. For wood-burning stoves, remove ash after every use, clean the exterior weekly, and have the chimney professionally swept annually.
Can I use household cleaning products in my sauna?
It's best to avoid conventional household cleaners, especially those containing bleach, ammonia, or strong detergents. These products damage wood, leave harmful residues that vaporise when heated, and produce unpleasant or dangerous fumes. Use natural alternatives like diluted white vinegar (1:3 ratio with water), baking soda paste, mild natural soap, or specialist sauna cleaning products specifically designed for timber.
How often should I replace sauna stones?
Sauna stones typically need replacement every 1-2 years with regular use. Replace them immediately if you notice cracks, crumbling, reduced steam production when water is added, unusual odours, or if they've become noticeably smaller. Remove and rinse stones every few months to extend their lifespan.
How do I prevent mould in my sauna?
Mould prevention relies primarily on proper ventilation. Always leave the door and vents open after use until the sauna is completely dry. Other preventative measures include wiping down surfaces after each session, using towels to protect benches, ensuring users shower before entering, addressing any water leaks immediately, and running the heater briefly after cleaning to evaporate residual moisture.


